Overview
A quick guide to setup and create an openvpn server that connects to a client to form a site-to-site. A solution to have a VPN into your home network without having a public IP available to you at home.
Requirements
- Cloud VM with a public IP running an OpenVPN server
- Home VM/client running OpenVPN client
Steps
- Create Linux VM in chosen cloud provider
- Setup Cloud VM OpenVPN Server
- Configure User Settings
- Configure VPN Settings
- Setup Home OpenVPN client
- Setup Client to forward IPv4 traffic and use NAT
- Automate connection at boot up
Create Linux VM in chosen cloud provider
It is important to remember to setup the firewall settings applied to the VPN to allow necessary ports. Port 22 for SSH and OpenVPN’s server port 943 are necessary.
- Check out the Terraform configuration on GitHub
- You will need Azure CLI installed and setup, alongside Terraform for this to work
For an automated Terraform deployment of a linux node in Azure, create the following files.
a Providers.tf file:
 1
 2
 3
 4
 5
 6
 7
 8
 9
10
11
12
| # Base config
terraform {
required_providers {
azurerm = {
source = "hashicorp/azurerm"
version = ">=3.0.0"
}
}
}
provider "azurerm" {
features {}
}
|
a networking.tf file:
  1
  2
  3
  4
  5
  6
  7
  8
  9
 10
 11
 12
 13
 14
 15
 16
 17
 18
 19
 20
 21
 22
 23
 24
 25
 26
 27
 28
 29
 30
 31
 32
 33
 34
 35
 36
 37
 38
 39
 40
 41
 42
 43
 44
 45
 46
 47
 48
 49
 50
 51
 52
 53
 54
 55
 56
 57
 58
 59
 60
 61
 62
 63
 64
 65
 66
 67
 68
 69
 70
 71
 72
 73
 74
 75
 76
 77
 78
 79
 80
 81
 82
 83
 84
 85
 86
 87
 88
 89
 90
 91
 92
 93
 94
 95
 96
 97
 98
 99
100
101
102
103
104
105
106
107
108
| # Create a resource group to maintain security settings along with network interfaces for VMs
resource "azurerm_resource_group" "vpn_server" {
name = "myvpn-resources"
location = "East US"
}
# ASSIGN ADDRESS SPACE TO RESOURCE GROUP
resource "azurerm_virtual_network" "vpn_server" {
name = "vpn-server-network"
address_space = ["192.168.0.0/16"]
location = azurerm_resource_group.vpn_server.location
resource_group_name = azurerm_resource_group.vpn_server.name
}
# ASSIGN SUBNET TO NETWORK ADDRESS SPACE
resource "azurerm_subnet" "myvpn_subnet" {
name = "vpnsubnet"
resource_group_name = azurerm_resource_group.vpn_server.name
virtual_network_name = azurerm_virtual_network.vpn_server.name
address_prefixes = ["192.168.10.0/24"]
}
# Create public IP variable for Linux machine
resource "azurerm_public_ip" "myvpn_public" {
name = "myvpn-PublicIp"
resource_group_name = azurerm_resource_group.vpn_server.name
location = azurerm_resource_group.vpn_server.location
allocation_method = "Static"
}
# ASSIGN NETWORK INTERFACE PER VM WE WILL BE USING
resource "azurerm_network_interface" "myvpn_linux" {
name = "myvpn-nic"
location = azurerm_resource_group.vpn_server.location
resource_group_name = azurerm_resource_group.vpn_server.name
ip_configuration {
name = "internal"
subnet_id = azurerm_subnet.myvpn_subnet.id
private_ip_address_allocation = "Static"
private_ip_address = var.myvpn_linux_priavte_ip
public_ip_address_id = azurerm_public_ip.myvpn_public.id
}
}
# Assignign network sec grp in Azure
resource "azurerm_network_security_group" "myvpn_linux" {
name = "VPN-Ports"
location = azurerm_resource_group.vpn_server.location
resource_group_name = azurerm_resource_group.vpn_server.name
#security_rule { #RDP
# name = "RDP"
# priority = 101
# direction = "Inbound"
# access = "Allow"
# protocol = "Tcp"
# source_port_range = "*"
# destination_port_range = "3389"
# source_address_prefix = "*"
# destination_address_prefix = "*"
#}
security_rule { #SSH
name = "SSH"
priority = 102
direction = "Inbound"
access = "Allow"
protocol = "Tcp"
source_port_range = "*"
destination_port_range = "22"
source_address_prefix = "*"
destination_address_prefix = "*"
}
security_rule { #HTTPS
name = "HTTPS"
priority = 103
direction = "Inbound"
access = "Allow"
protocol = "Tcp"
source_port_range = "*"
destination_port_range = "443"
source_address_prefix = "*"
destination_address_prefix = "*"
}
security_rule { #OpenVPN
name = "OpenVPN"
priority = 104
direction = "Inbound"
access = "Allow"
protocol = "Udp"
source_port_range = "*"
destination_port_range = "1194"
source_address_prefix = "*"
destination_address_prefix = "*"
}
security_rule { #OpenVPN
name = "OpenVPNsite"
priority = 105
direction = "Inbound"
access = "Allow"
protocol = "Tcp"
source_port_range = "*"
destination_port_range = "943"
source_address_prefix = "*"
destination_address_prefix = "*"
}
}
# ASSIGN SECURITY GROUPS TO INTERFACES
# LINUX SSH
resource "azurerm_network_interface_security_group_association" "myvpn_linux" {
network_interface_id = azurerm_network_interface.myvpn_linux.id
network_security_group_id = azurerm_network_security_group.myvpn_linux.id
}
|
a outputs.tf file:
1
2
3
4
5
6
| output "Public_IP_Linux" {
value = azurerm_public_ip.myvpn_public.ip_address
}
output "Private_IP_Linux" {
value = azurerm_network_interface.myvpn_linux.private_ip_address
}
|
a 01-VPNserver.tf file:
 1
 2
 3
 4
 5
 6
 7
 8
 9
10
11
12
13
14
15
16
17
18
19
20
21
22
23
24
25
26
27
28
29
30
31
32
33
34
35
36
37
38
39
40
41
42
43
44
45
46
47
48
49
50
| resource "azurerm_linux_virtual_machine" "vpn" {
name = var.linux_server
resource_group_name = azurerm_resource_group.vpn_server.name
location = azurerm_resource_group.vpn_server.location
size = var.linux_vm_size
admin_username = var.linux_username
network_interface_ids = [
azurerm_network_interface.myvpn_linux.id
]
admin_ssh_key {
username = var.linux_username
public_key = file("${var.linux_ssh_key}")
}
# Cloud-Init passed here
custom_data = data.template_cloudinit_config.config.rendered
os_disk {
caching = "ReadWrite"
storage_account_type = var.linux_sa_type
}
source_image_reference {
publisher = var.linux_vm_os_publisher
offer = var.linux_vm_os_offer
sku = var.linux_vm_os_sku
version = "latest"
}
depends_on = [azurerm_resource_group.vpn_server, azurerm_network_interface.myvpn_linux]
}
# Create cloud-init file to be passed into linux vm
data "template_file" "user_data" {
template = file("./cloudinit_config.yml")
}
# Render a multi-part cloud-init config making use of the part
# above, and other source files
data "template_cloudinit_config" "config" {
gzip = true
base64_encode = true
# Main cloud-config configuration file.
part {
filename = "init.cfg"
content_type = "text/cloud-config"
content = "${data.template_file.user_data.rendered}"
}
}
|
a variables.tf file:
 1
 2
 3
 4
 5
 6
 7
 8
 9
10
| variable "linux_server" {}
variable "linux_vm_os_publisher" {}
variable "linux_vm_os_offer" {}
variable "linux_vm_os_sku" {}
variable "linux_vm_size" {}
variable "linux_ssh_key" {}
variable "linux_sa_type" {}
variable "myvpn_linux_priavte_ip" {}
variable "linux_username" {}
variable "linux_password" {}
|
a terraform.tfvars file:
 1
 2
 3
 4
 5
 6
 7
 8
 9
10
11
12
13
14
15
16
17
| # Azure Linux Server related params
linux_vm_os_publisher = "Canonical"
linux_vm_os_offer = "UbuntuServer"
linux_vm_os_sku = "18.04-LTS"
linux_vm_size = "Standard_B1s"
linux_ssh_key = "/mnt/c/Users/austi/.ssh/id_rsa.pub"
linux_sa_type = "Premium_LRS"
# Which administrator password to set during vm customization
linux_username = "austin"
linux_password = "X$zz6AkcWMbkKF"
# Naming Schemes
linux_server = "Austin-VPN"
# Networking Variables
myvpn_linux_priavte_ip = "192.168.10.5"
|
Finally, the cloudinit_config.yml file:
 1
 2
 3
 4
 5
 6
 7
 8
 9
10
11
12
13
14
15
16
17
18
19
| #cloud-config
package_upgrade: true
packages:
- curl
users:
- name: vpn
ssh-authorized-keys:
- ssh-rsa AAAAB3NzaC1yc2EAAAADAQABAAABgQDA9eacR4LWgR5nceoXTmvcf+W8LUzIGCmDNrniaznFRmUuylRGRhPx3blclPB6ToK5bcUQAqTMfothgkB0Rr9xZW41zqqjMgefhyZXBPfEvplxuWTa4tTaxQRL99YOFhxvaRday+mOCqtUybDUvWEMXkVhLFCb8+cCLXEKIyPMMR8mCIh/eYkAZsYgRanRA2DAJ0fVFCfD6qJVq5xaCjEx5q3OrkIIliwsy5etPEYMBgqxKut1FtQKS4mHVckRZCLD95c7XvCAboHXpQuwT8UWTlUw7jg+AoL8e4uQrofCIX1tgZ/vtyb5Xu9Y8rAxURaPf9bEV8Bqrq8B60OU8Dbo7xW9/oQE4TvJbuDSFSgPk0EtOj8EjP4yRQO94M9k5mp/i2olYWWCjpFQ5E2p9ESoDx2Ty3aoLCuIUsD+M7vw3U3sprzC+ogC8jFVgI995LvIqJkj3Bx7I+T6z8Y8Ihg/FO3SbIEKO9tFX7kAheCwAxefYjG+VA7lsWICZgEN+xE= austi@Austin-Desktop
- ssh-rsa AAAAB3NzaC1yc2EAAAADAQABAAABgQDp2pYRPzxTAwXC0lplkhsJE02X/zlN9iVdrqejBEXbBSK9kUlXu2zsq0J+OGhCTsCoBDjYCE4j0UHQCnMyPFKX2uH1ZVV6jqeLjYvHAthEHoA1T5r/rByhKP8o8S3ud5TIOtD5en9LB8fBAd72865LrLr9v/9RybtKOErcf4Easb3GFLdjkrix0la1rduaBv6ZSCosM833FVVcr/GFwwroDURjd/yW9ROYbQWxfbFpA8B0srY1A6et9McvMoMTqfq5qv6NpPH+1QqAtAa2SjphbIpnVq0y8RL8k+f6frAcl2+qHjkAeURRC+r7yvNJmixyK/C4jJmjG2WtQ/fdHP+x1Kt/WDlGHEenpPR2IqIt5wMAbFES1MPRffHMgwY+c6N5Ia6yFZK/t9lrXglqwQcy4y97S035zw5TnxbRKowcnD39wX4ynfgeLDeHvrp6ZzjgLUM4UK7WvyiJ+EeOm4spy9OUnGYj0Bz2M3oIGEHzsCYJqfVoqDuxevQV69wdYXE= austi@Austin-Desktop
sudo: ['ALL=(ALL) NOPASSWD:ALL']
groups: sudo
shell: /bin/bash
runcmd:
- sudo su -
- apt update && apt -y install ca-certificates wget net-tools gnupg
- wget -qO - https://as-repository.openvpn.net/as-repo-public.gpg | apt-key add -
- echo "deb http://as-repository.openvpn.net/as/debian bionic main">/etc/apt/sources.list.d/openvpn-as-repo.list
- apt update && apt -y install openvpn-as
- cat /usr/local/openvpn_as/init.log > openvpnlog.txt
|
Once these are setup on a machine with Terraform, and the Azure CLI is configured correctly, run:
1
2
| terraform init --upgrade
terraform apply --auto-approve
|
Retrieve the public
Setup Cloud VM OpenVPN Server
SSH into your cloud server using the public IP address.
- Follow this guide for setting up OpenVPN server
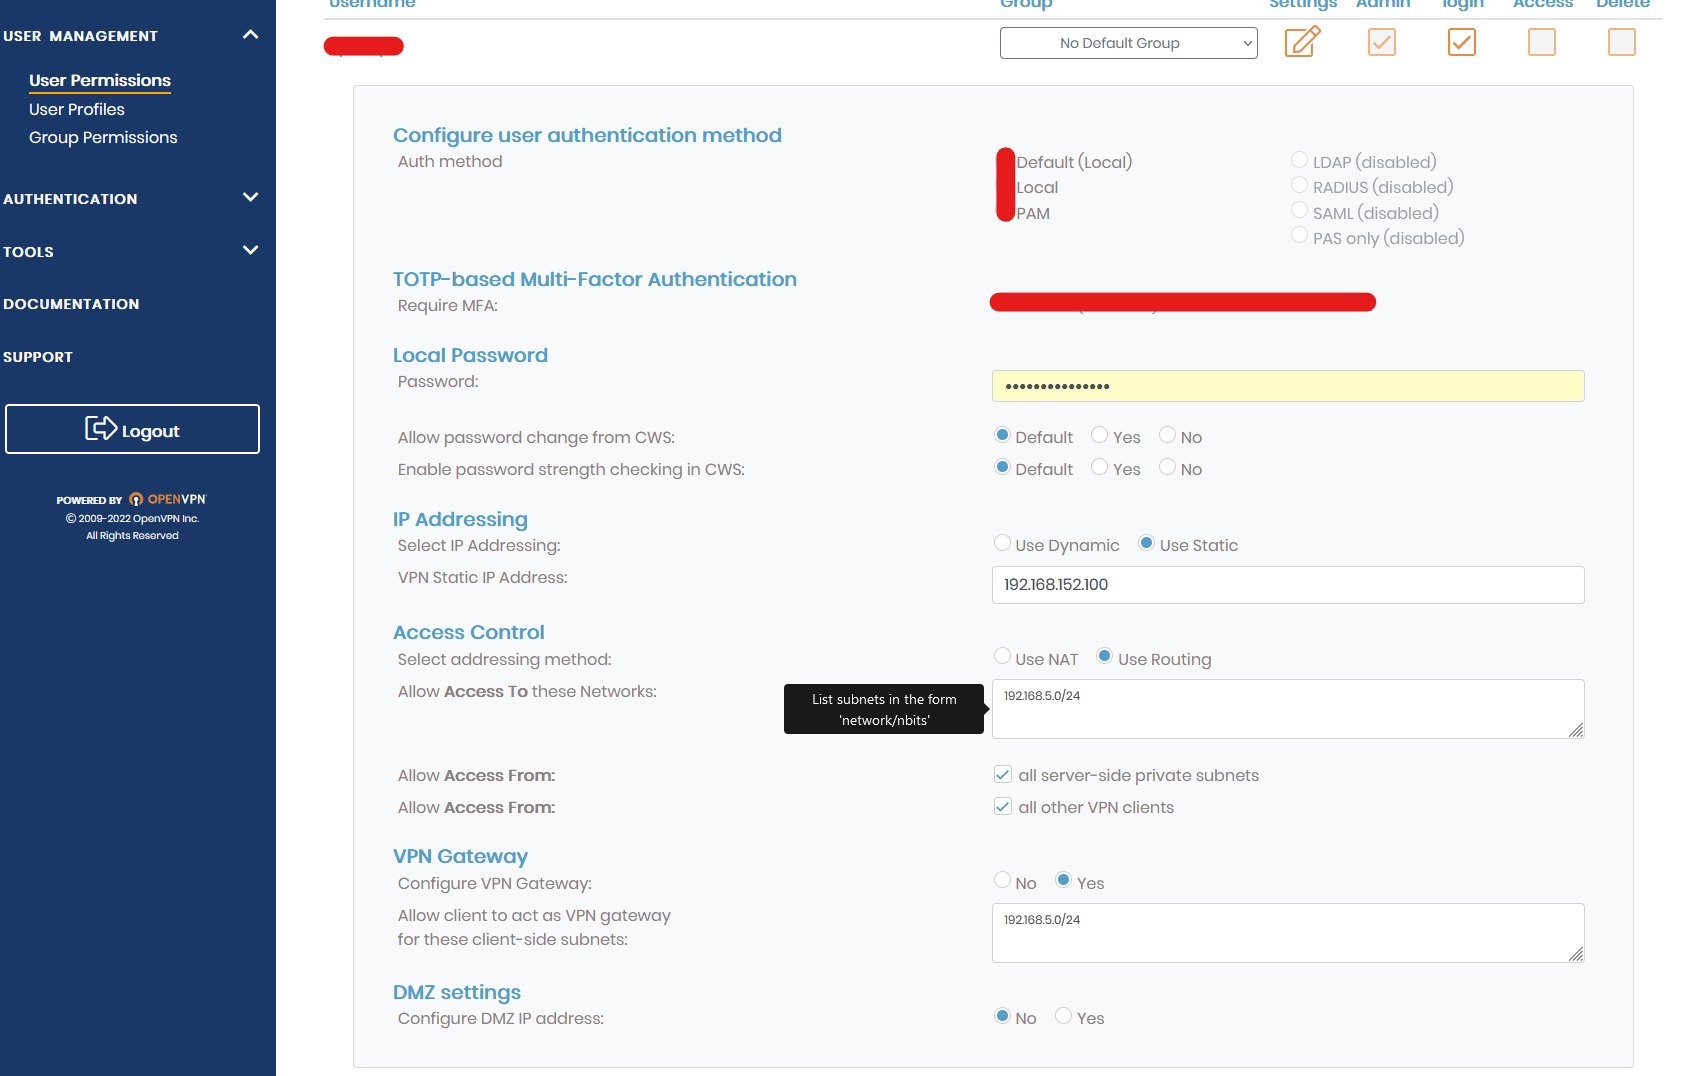
- Create a user under User Management -> User Profiles
- Under User Management -> User Permissions, give the user Allow Auto-login rights.
- Under that user, hit More settings.
- Change Access Control to Use Routing. Then enter the network you wish the user to be able to access while on the VPN.
- Enable Access from both VPN clients and Server-side private subnets
- Change VPN Gateway to ‘Yes’, and enter client side subnets you wish to access.
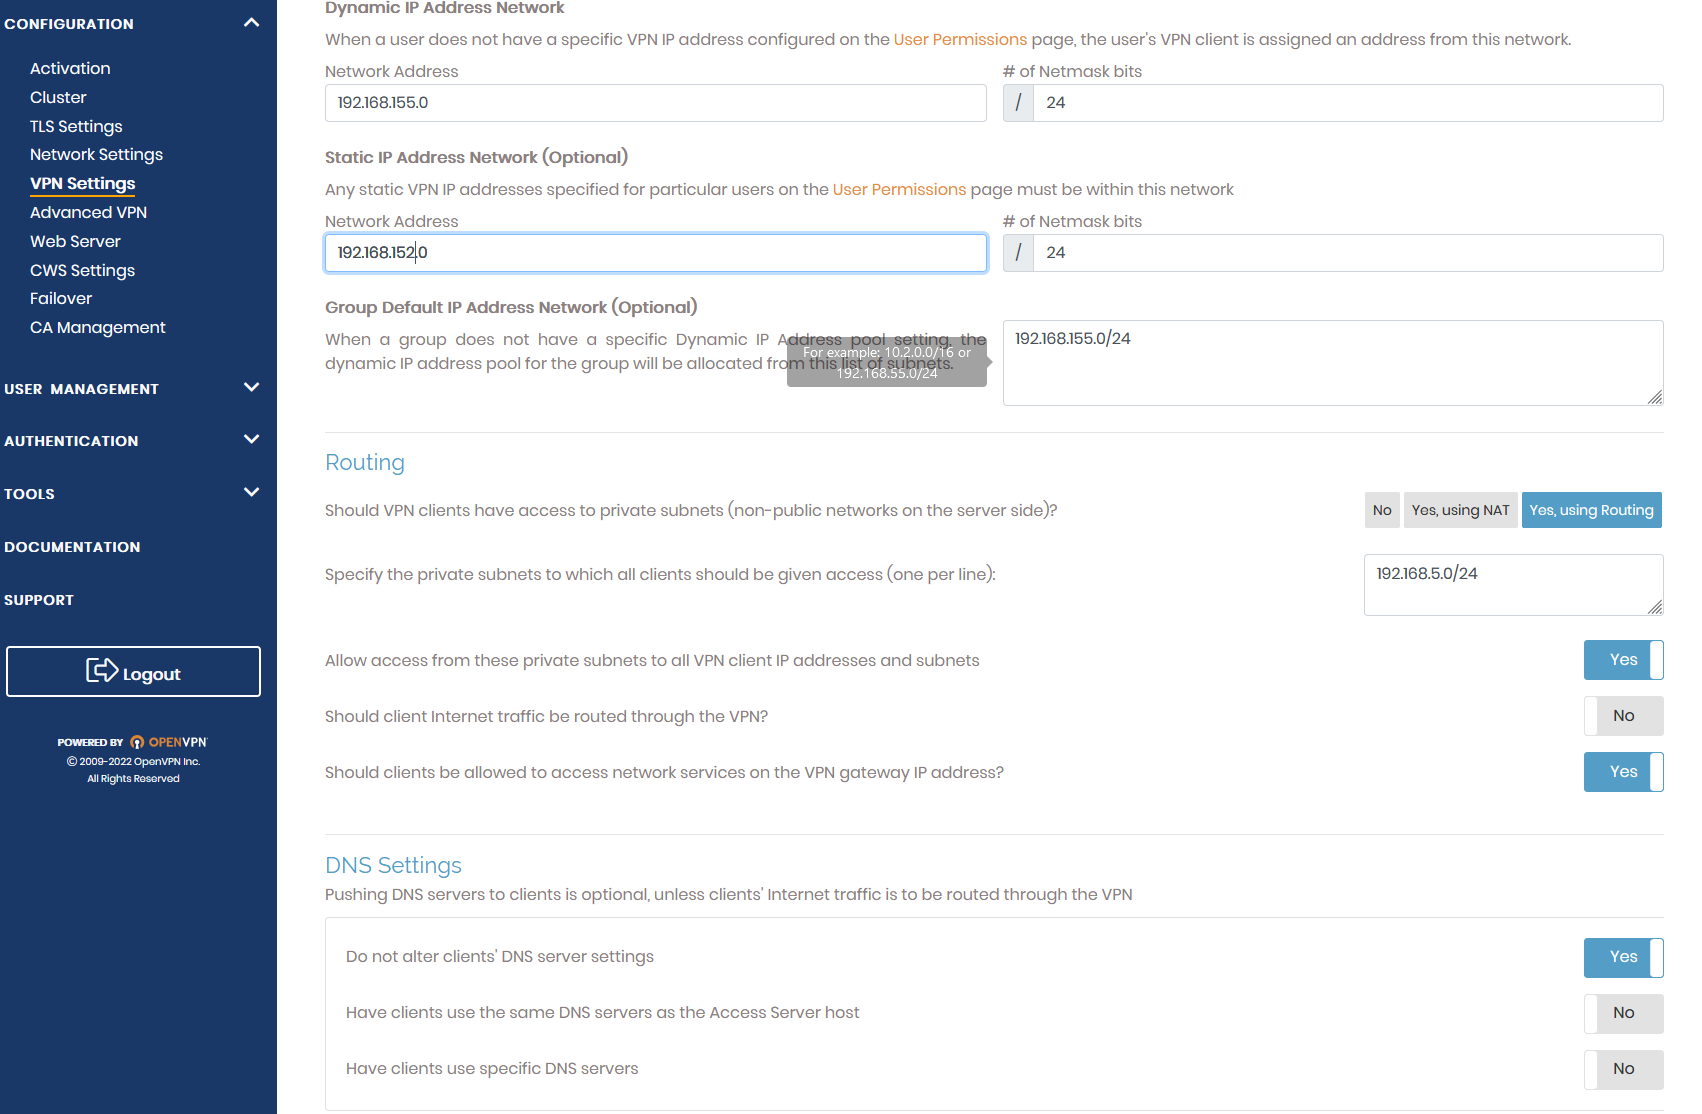
- Under the Configuration -> VPN Settings tab.
- Change Routing to ‘Yes, using Routing. Enter private sub nets clients should be able to access.
- Change ‘Allow access form these private subnets to all VPN client IP addresses and subnets’ to ‘Yes’
- Change ‘Should clients be allowed to access network services on the VPN gateway IP address?’ to ‘Yes’
- I recomeend enabling all traffic being sent over VPN, due to my slow connection at home I have it off.
- DNS settings are preference.
Setup Home OpenVPN client
For reference, this will be based on using an Ubuntu 20.04 VM.
- First install the client
apt update -y && apt install openvpn -y
- Download thee client.vpn file from your VPN server
- Navigate to the URL and sign in as the VPN user going to authenticate the client
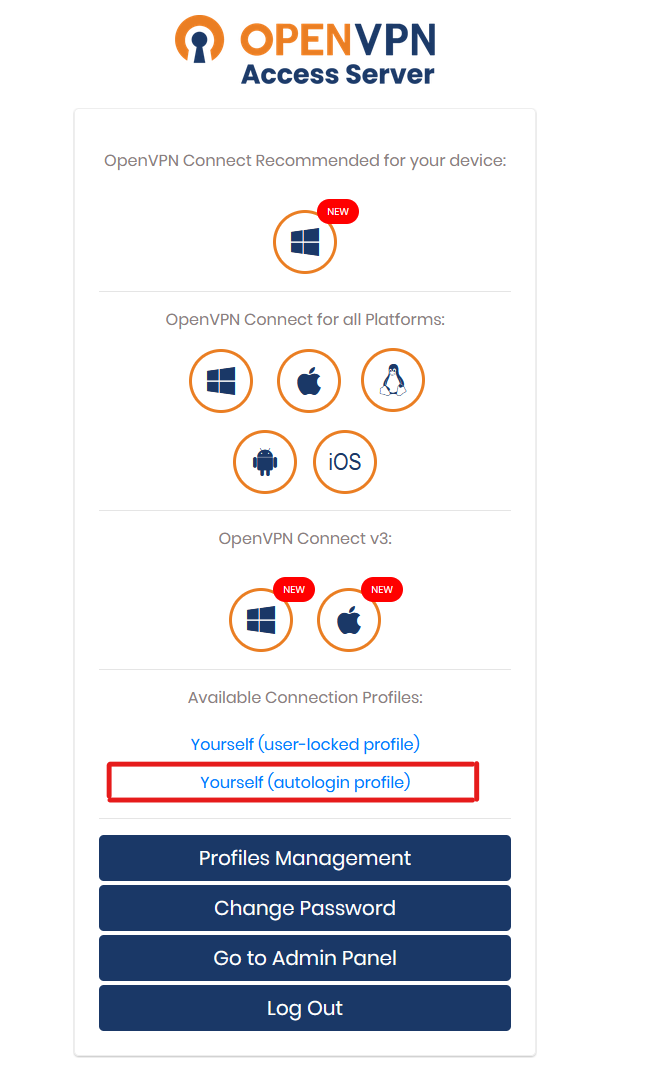
- Upload the config file generated from the autologin profile of VPN user to the VM
- SCP to move file to VM ex:
scp \local\file\location\client.ovpn user@server:\etc\openvpn - Connect client to server by running
openvpn --config client.ovpn --daemon
Setup Client to forward IPv4 traffic
We must enable IP forwarding along with NAT on the Ubuntu OpenVPN client in order for traffic to reach your internal services on the other end of the site-to-site VPN.
This is achieved with the following steps:
- Enable IP forwarding
- Edit /etc/sysctl.conf file
- Uncomment the line
- Restart sysctl to enable forwarding
- Enable NAT
iptables -t nat -A POSTROUTING -j MASQUERADE
- Keep settings persistent between boots
apt install iptables-persistentiptables-save > /etc/iptables/rules.v4
Automate connection at boot up
By altering the ovpn into a config file, and moving it into the openvpn directory /etc/openvpn, at bootup the client will autheitnciate with the server if it is able to.
Move client.ovpn file and rename it to client.conf
mv /etc/openvpn/client.ovpn /etc/openvpn/client.conf
Useful Resources