Overview
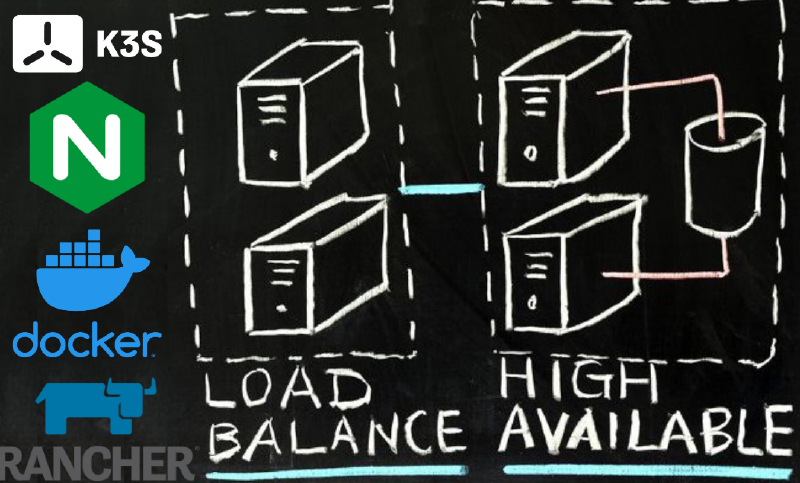
Getting started with K3S: The primary goal here is to setup a functional highly available K3S cluster. This will include 4 necessary steps:
- Setup NGINX Loadbalancer Docker
- Setup MySQL Docker
- Setup Highly Available K3s Cluster
- (Optional) Setup management from dev machine (Controller)
- Setup Rancher as a container within the cluster
Check out all of the configuration files on GitHub (k3s-HACluster-Rancher) at the repository!
Prerequisites
- Have a dedicated Docker host virtual machine, preferrably linux
- Have 5 Linux virtual machines ready
- Two will be Master Nodes, and Three will be worker nodes. Each will have a dedicated IP address.
I personally ran all of my linux Virtual Machines as Ubuntu Server 20.04
1. Setup NGINX Loadbalancer Docker
Log into your dedicated docker linux host and create a NGINX Loadbalancer using docker Ensure docker-compose is installed
sudo curl -L "https://github.com/docker/compose/releases/download/1.29.2/docker-compose-$(uname -s)-$(uname -m)" -o /usr/local/bin/docker-composesudo chmod +x /usr/local/bin/docker-compose
After setup, create a directory for nginx, and create a file called docker-compose.yml with the following contents
| |
- In the same directorty, create a nginx.conf file with the following contet:
- change <IP_MASTER_NODE1 & 2> to your two node IP addresses. Change <IP_NODE_1,2,3> to Worker Node IPs
| |
- Commands to setup:
- Change nginx.conf file to match your configuration
- Enter file directory of nginx and apply
sudo docker-compose up -d
2. Setup MySQL Docker
On the same dedicated docker host that the nginx loadbalancer is running on: Create new directory for mysql and put a docker-compose.yml file in it with the following:
| |
Commands to setup:
- Enter file directory of mysql and apply
sudo docker-compose up -d - Enter the docker to execute commands
sudo docker exec -it mysql bash
mysql -p(Enter password)- Next, create the database and assign a user to it to be used with the K3s cluster within the mysql bash shell using the following SQL commands.
- Change ‘password’ and ‘user’ to your desired variables
1 2 3 4CREATE DATABASE k3s COLLATE latin1_swedish_ci; CREATE USER ‘user’@’%’ IDENTIFIED BY ‘password’; GRANT ALL ON k3s.* TO 'user'@'%'; FLUSH PRIVILEGES;
To Note: the Database MUST be latin1_swedish_ci
3. Setup Highly Available K3s Cluster
These will be setup in three steps. The first, setting up the first master node in the K3s cluster. Then, joining an additional master node. Finally, adding the worker nodes.
1. Primary Master Node setup
On the first Server node run these commands:
export K3S_DATASTORE_ENDPOINT='mysql://user:password@tcp(sqlhost:3306)/database-name- Change values to your database values. ‘user’, ‘password’, ‘sqlhost’, ‘database-name’
curl -sfL https://get.k3s.io | sh -s - server --node-taint CriticalAddonsOnly=true:NoExecute --tls-san 'Load-Balancer-Address'
After it has connected and you can successfully, check and ensure you can see the node with sudo kubectl get nodes
- Obtain node-token from
sudo cat /var/lib/rancher/k3s/server/node-token- This will be used in the next steps to join the second master node and the workers
2. Secondary Master Node setup
On additional server nodes:
export K3S_DATASTORE_ENDPOINT='mysql://user:password@tcp(sqlhost:3306)/database-name- Change values to your database values. ‘user’, ‘password’, ‘sqlhost’, ‘database-name’
Curl -sfL https://get.k3s.io | sh -s - server --node-taint CriticalAddonsOnly=true:NoExecute --tls-san 'Load-Balancer-Address' --token server-token-here sh -- Change values to your database values. ‘Load-Balancer-Address’, ‘server-token-here’
3. Worker Node Setup
On all client agents to be added to cluster
export K3S_DATASTORE_ENDPOINT='mysql://user:password@tcp(sqlhost:3306)/database-name'- Change values to your database values. ‘user’, ‘password’, ‘sqlhost’, ‘database-name’
curl -sfL https://get.k3s.io | K3S_URL=https://'Load-Balance-Address':6443 K3S_TOKEN=server-token-here sh -- Change values to your database values. ‘Load-Balancer-Address’, ‘K3S_TOKEN=server-token-here’
4. (Optional) Setup management from dev machine (Controller)
Once Cluster has been setup
- install k3s on controller machine w/
curl -LO "https://dl.k8s.io/release/$(curl -L -s https://dl.k8s.io/release/stable.txt)/bin/linux/amd64/kubectl" - On a server node run:
sudo nano /etc/rancher/k3s/k3s.yaml
- Copy contents of that file to a file on your dev machine at location /home/user/.kube/config
- Change IP address in config to match your Load Balancer
- verify it is working w/
kubectl cluster-info
You can now control your K3s cluster from another machine, outside of the cluster!
5. Setup Rancher as a container within the cluster
Deploying Rancher on Workers using Helm This deployment will be using the self-generated Rancher Certificate. Either from a Master Node, or the Controller machine (If you followed step 4):
Add the Helm Chart Repository
- Install helm
curl -fsSL -o get_helm.sh https://raw.githubusercontent.com/helm/helm/main/scripts/get-helm-3chmod 700 get_helm.sh./get_helm.sh
- Use Stable release:
helm repo add rancher-stable https://releases.rancher.com/server-charts/stable
- Install helm
Create Namespace within K3s for Rancher
kubectl create namespace cattle-system
Install Cert Manager (Required for self-hosted cert)
kubectl apply -f https://github.com/jetstack/cert-manager/releases/download/v1.5.1/cert-manager.crds.yamlhelm repo add jetstack https://charts.jetstack.iohelm repo update- If you experience an issue running this, such as localhost:8080 error, add KUBECONFIG as an environment variable to fix it:
1 2 3 4helm install cert-manager jetstack/cert-manager \ --namespace cert-manager \ --create-namespace \ --version v1.5.1export KUBECONFIG=/etc/rancher/k3s/k3s.yamlIf that does not fix it, ensure the .kube config file exists in the proper locaitonkubectl config view --raw > ~/.kube/config - Verify it is working w/
kubectl get pods --namespace cert-manager
Install Rancher using Helm
1 2 3 4 5helm install rancher rancher-stable/rancher \ --namespace cattle-system \ --set hostname=port.lan \ --set replicas=3 \ --set bootstrapPassword=password- Check on deployment w/
kubectl -n cattle-system rollout status deploy/rancher - Once finished, obtain info on deployment w/
kubectl -n cattle-system get deploy rancher
Once Rancher is deployed
- Navigate to {LoadBalancer-DNS} site
- It must be the DNS entry of the Load Balancer due to the certification. An IP adddress will NOT work
- Find your secret using command given at site login, and log into the site
- Navigate to {LoadBalancer-DNS} site
Bam, Rancher installed, and it is now highly available.
Troubeshooting Rancher
- If you must uninstall and reinstall Rancher for any reason, I recommend these steps (They are painful)
- For the name spaces affecting Rancher Directly,
sudo kubectl delete namespace namespace-name- Check it w/
kubectl get ns - If stuck in terminating,
kubectl edit ns namespace-name- Delete everything under the finalizer: fields (Sometimes there are two.)
Useful Resources & Commands
Useful Docker Commands
- The load balancer and database are setup using Docker-compose
- Useful Docker compose commands:
1 2 3 4 5 6 7 8 9 10# Sping up a docker based on docker-compose.yml file docker-compose up -f 'filenamehere' # Sping up a docker and keep it running docker-compose up -d # Find list of running docker processes docker ps # Get into shell of a running docker docker exec -it [option] bash # Update running docker with new configuration changes docker-compose up -d --force-recreate
Useful Kubectl Commands
- Kubernetes commands (Mostly pulled from kubectl cheat sheet)
- Finding ressources
1 2 3 4 5 6 7 8 9 10 11 12 13 14 15 16# Get commands with basic output kubectl config view # Show Merged kubeconfig settings. kubeclt get nodes # Show all nodes in the cluster kubectl get services # List all services in the namespace kubectl get pods --all-namespaces # List all pods in all namespaces kubectl get pods -o wide # List all pods in the current namespace, with more details kubectl get deployment my-dep # List a particular deployment kubectl get pods # List all pods in the namespace kubectl get pod my-pod -o yaml # Get a pod's YAML``` # Describe commands with verbose output kubectl describe nodes my-node kubectl describe pods my-pod # List Services Sorted by Name kubectl get services --sort-by=.metadata.name- Updating resources
1 2 3 4 5 6kubectl set image deployment/frontend www=image:v2 # Rolling update "www" containers of "frontend" deployment, updating the image kubectl rollout history deployment/frontend # Check the history of deployments including the revision kubectl rollout undo deployment/frontend # Rollback to the previous deployment kubectl rollout undo deployment/frontend --to-revision=2 # Rollback to a specific revision kubectl rollout status -w deployment/frontend # Watch rolling update status of "frontend" deployment until completion kubectl rollout restart deployment/frontend # Rolling restart of the "frontend" deployment- Allow kubectl without sudo priviledge
sudo chmod 644 /etc/rancher/k3s/k3s.yaml
Resources
- Shout out to TheQuib I thank him for his collaboration on this
- Rancher Documentation
- Docker Compose Documentation